In part 1 we discussed the 3 options available for running your Timpi Guardian Node. Now we will focus on Option 2 – running your node on a cloud VPS.
Which VPS provider?
We have already selected Contabo for our VPS, but you can choose from the thousands of available VPS providers. Each will have their own pricing model, support model and reputation. Do your own research and make sure you read the small print! There are often bandwidth constraints for heavy usage if you are using shared VPS services – make sure any thresholds/throttling that is listed in the small print, will still meet the minimum recommendations for a Timpi Guardian Node.
Buying the right size VPS
Head over to the Contabo website to look at the shared VPS services.
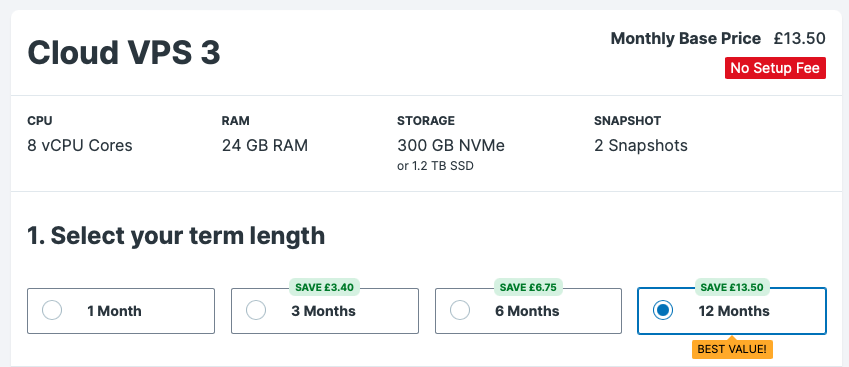
For a single Timpi Guardian Node – to meet the recommended spec – you’ll need to select the ‘Cloud VPS 3’ service.

Configure your VPS service
To make sure you get the right configuration of Cloud VPS 3 make sure you select the following:
Select your term = any (choose based on your situation – longer terms get slight discounts)
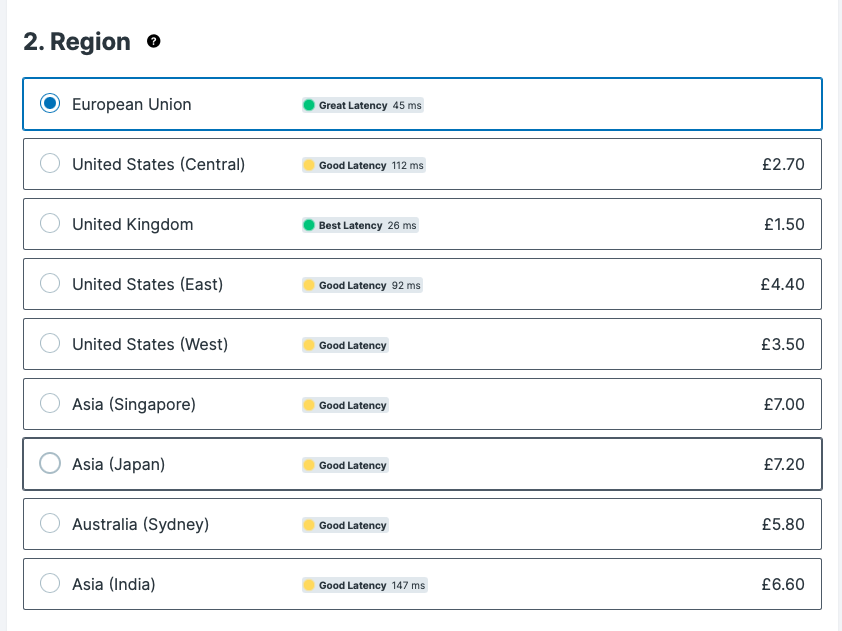
Select Region = EU is standard + no additional charge (you can pay to locate your VPS in a different region based on your needs)
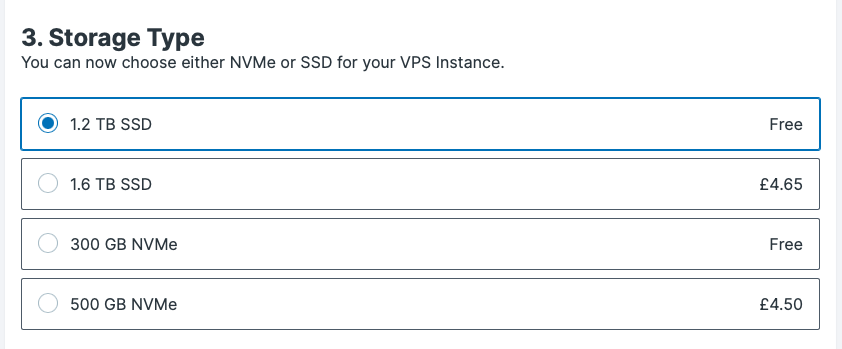
Select storage type = 1.2TB (you will either need to select 1.2TB or 1.6TB SSD here as the Timpi Guardian Node needs a minimum of 1TB FREE space after OS + Software install).
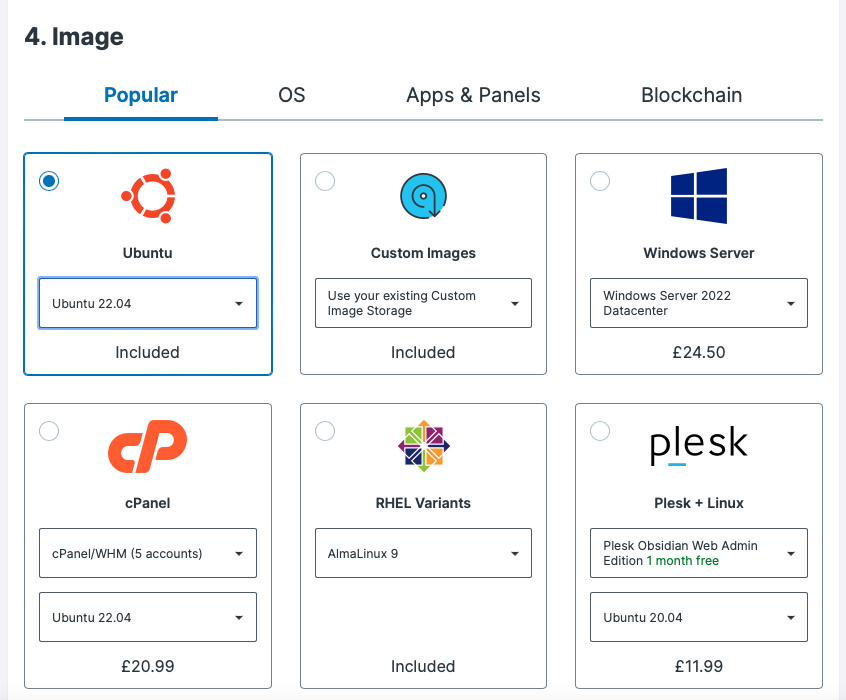
Select Image = Ubuntu 22.04 (if your VPS provider supports 24.04 you can choose this instead).
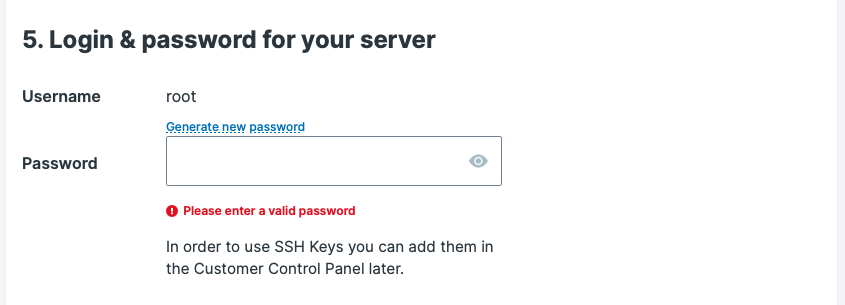
Login details – Choose (or generate) a root user password
NOTE: Make sure you make a note of this password as you’ll need it later. We will change it for security reasons once we have access to the VPS.
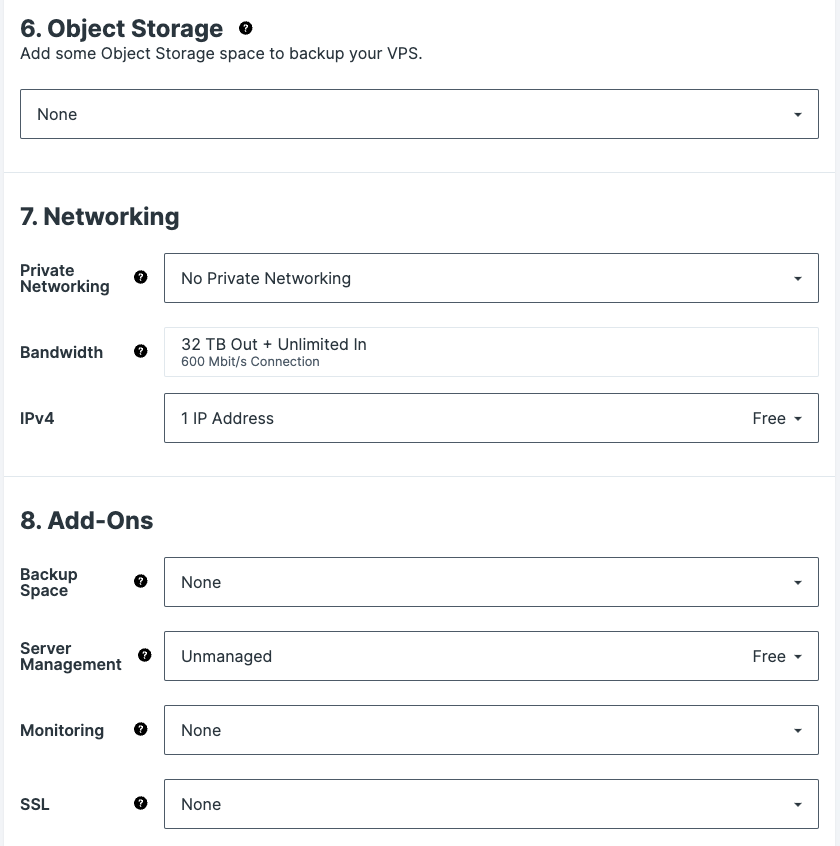
Object Storage = none
Networking = leave as default
Add-ons = leave as default
Now select ‘next’ and either log in or setup an account.
Pay for your service.
You will get an email confirming your order.
Sometime later, Contabo will then provision your service and once complete send you an email containing your VPS details:

Basic VPS Set Up
Now you’ve got your VPS we need to log in and get some basic settings done – making sure you’ve secured the server and setup your remote management properly.
Step 1 – Get an SSH Client
If you don’t already have one you’ll need to get an SSH client.
For Mac/iOS users we would highly recommend Server Cat which, if you manage multiple servers/nodes regularly, it is definitely worth the £24.99 lifetime license.
A quick search for ‘recommended SSH client for <your_platform>’ will get you a bunch of free/freemium/paid options – pick one that works for you.
Step 2 – Setup your SSH Client to connect to your Contabo VPS
Open your SSH client (I’m using Server Cat – but your SSH client may have slightly different options/terminology).
- Add a new server/host/connection
- Give it a name e.g. Timpi Guardian Node ### (We like to use the access NFT number so we know exactly which Timpi node we’re opening up)
- Host = <insert_your_VPS_IP_Address>
- Port = 22 (we’ll change this later)
- User = root (we’ll add another user later)
- Password = (this is the one you set on the Contabo VPS purchase)
Save.
Step 3 – Connect to your Contabo VPS
With the settings saved you can now open a connection to your Contabo VPS.
Step 4 – Change root password
In order to secure your VPS you need to change your root password from the one created when your ordered the VPS.
passwd
enter new password
confirm new password
Step 5 – Create sudo user
You don’t want to run your node as root so we need to create a new user and give it sudo permission:
adduserenter passwordenter details (default for all)
confirm password

then add that user to the sudo group:usermod -aG sudo <user>
Step 6 – Change SSH Port
The default SSH port is 22. Everyone knows this so to leave it open is unwise. To change your ssh port we need to edit the config:
sudo nano /etc/ssh/sshd_config
Where it says ‘Port 22’, delete the # and change the number from 22 to something else unique. like 2000 or 2222 or a number in between would work too.
Type ctrl + x to exit, hit ‘y‘ and enter to save.
To enable this on the firewall:
sudo ufw allow <your_port_number>/tcp
Then restart the sshd service for it to take effect:
sudo systemctl restart sshd
Step 7 – Create new SSH Client connection for new user/port combo
Now that you’ve change the ssh port you’ll need to update your SSH client connection with the new port number. You may as well also change it from the root user over to the new sudo user you created at the same time. It’s best practice not to use the root user for access or installation/running services.
Step 8 – Create a SSH key
To add extra security to your ssh connection it’s recommended to turn off user/password authentication and instead set up an SSH Key.
Instructions for using an SSH key with Contabo can be found here.
These tell you how you can generate your key on different platforms.
If you are using Server Cat like I am – it has key generation built in.
Server Cat
- Go to ‘keychain’
- Click ‘+’
- Select ‘Generate RSA(2024) Key’
- Add a passphrase (like a password – make sure you save this)
Step 9 – Configure SSH to use Key instead of username/password
Now you have your key we need to configure it on the VPS. We need to make a folder called .ssh:
sudo mkdir ~/.ssh
Now go to that folder
cd ~/.ssh
Now create a file to hold the key:sudo nano authorized_keys
Copy/Paste your public key into the file.
Type ctrl + x to exit, hit ‘y‘ and enter to save.
Now we need to update the sshd to use the key and not user/password:
sudo nano /etc/ssh/sshd_config
Set the following to ‘yes’:
PubkeyAuthentication
Now set the following values to ‘no’:
PasswordAuthentication
ChallengeResponseAuthentication
UsePAM
Type ctrl + x to exit, hit ‘y‘ and enter to save.
Now restart sshd for the changes to take effect:
sudo systemctl restart sshd
Step 10 – Update SSH Client config to use key
Now you’ll need to update your SSH client to use the key instead of username/password.
Server Cat
- Right click on your Timpi Guardian node host
- Delete password
- Select the correct key from the ‘SSH Key’ dropdown
- Save
Test your SSH connection.
[if the worst happens and something goes completely wrong and you’re not sure how to fix it – locking you out of your VPS – you can reset your VPS on the Contabo website account page]
Next steps
That’s your VPS set up with the basics. You’ve got your sudo user, ssh key and basic configuration done. You’re now ready to start the Timpi Guardian steps which we’ll cover in Part 3.
Note: we do not hold any affiliate or marketing relationships with Contabo or any other providers we feature in this blog.

